In order to understand how actually exciting this post is, you have to understand that I detest ironing. Nothing in my house gets ironed except for those things that absolutely must be. That means clothing to be worn gets done maybe twice in a year and many things are topstitched that should not be so so that I can get away with finger pressing.
That being said, I spent 2 hours last night ironing. There are now 25 or so yards of 1 1/2" bias in blue brocade ready to be attached to the cappotto. It is sort of a miracle brought on by my vanity goading my laziness. It is just going to look so pretty though and I know it will be worth it. Even if the half assed voice in the back of my brain keeps trying to convince me otherwise.
My mom taught me to do continuous bias when I was a kid. Large numbers of quilts happened at our house once we were all old enough to hold a needle. Quilting at our house was also usually stitching on whole cloth so the stitching was the important part of making a quilt. Anyway, that is the method I use for bias. A search will turn up plenty of tutorials if you need one. Basically you cut a square corner o corner and then reattach into a parallellogram, mark, sew into an offset tube, and start cutting. It is all one strip, which is rather nifty. You can calculate the size of the square to make just the right amount of bias, but I didn't really want to and have other places to use it if I have extra. I did a 60" square cut into 3" strips.
Somewhere in my sewing room there should have been bias tape makers but they were not to be found. Some stuff is still in storage, so they could, technically, not actually be there and the 3 hours I spent searching for them was not fruitless because I'm just a dope. I really hope that is the actual reason. Anyway, they didn't turn up and it was late and I was determined to finish this. Luckily, Margo Anderson had posted a tip a few days ago to the Elizabethan Costume Facebook group. If you take a large needle and stitch it through your ironing board cover twice, leaving your bias measurement in the middle, you can run the fabric through and it will fold. Press it as you pull through and it works about as well as the tools meant for the job.
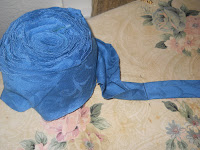
And voila, there is a huge coil of bias.
I pinned the first section in place and began couching. Finished one side of the front, which was my goal. I've divided it into 4 sections, because the vents already do that. Each section has 2 guards so it should (cross your fingers) be done in about 8 days. Then there's sleeves to couch and assembly. I'm shooting for a two week project. I hope.


I've often thought about spending the $$$ to buy a bias tape maker, but I have the little silver tools in varying widths and just can't seem to justify the upwards of 100$ for all the different sizes I want/need.
ReplyDeleteI make my tape the same way you do, old fashioned ;). It is certainly a PITA but it does look rather nice on garb.