Sunday, March 31, 2019

Getting started with IRCC 9

It's been awhile. I keep finding myself linking to old posts, so I decided it was time to get back to using this. As I'm playing in the Italian Renaissance Costuming Challenge again this year, it seemed an opportune time. I'm also planning on finally making the Margherita Paleologo dress that I've previously tried doing twice a before.  I blogged about that here. I figure if I keep blogging it is a continuation and I can call it a successfully finished UFO once it's done. Sewing starts at midnight and I may be just a little over excited. 

So, the plan:

Collared camicia: embroidered spot motifs, embroidered collar and cuffs, insertion stitches, buttons. I plan to carve a block to print the spot motifs and embroider over them.

Fuller style drawers: eyelets and cording


Corded petticoat: hand done eyelets, fingerloop cord to fasten.

Pink silk sottana:carve block and print the silk, woven trim for sleeves,  felt stiffened hem, handmade linen cardboard for stiffening, eyelets, braided lacing cord, buttons and button loops

Black velvet interlace over gown: faux strapwork, couching, eyelets, cord

Balzo: basket reed base, wire work rings, rose center brooch, flax seed goop for hair work

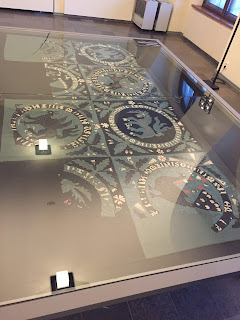
Outdoor veil: Gold dyed like the one in the back of the picture, probably either saffron or turmeric, pleating

Leather gloves: felt mockup,

Loop in loop chain belt with lapis rosary: fused copper rings, cast buckle, carved St. Catherine image, paternoster beads

Shoes and chopines: considering gilded shoes, building chopines

Stockings and garters: sprang garters, fitted linen stockings with embroidery


Friday, January 26, 2018

Pocket gryphon pattern


I've been trying to come up with a cute (and easy) gryphon stuffed animal for awhile. Over the years I have tried doing a couple of flat styles and some overly complex versions, but nothing stuck I was looking for something that could be easily made for largesse. So, I pulled up one of the most popular stuffed patterns out there for SCA use and decided to adapt it since it had already proved to be able to do what I wanted. Lady Katsumi's dragon pattern is amazing. Having seen them turn up in many a largesse basket and seeing how fast they were snapped up, it seemed the logical starting place. My gryphon didn't have much in common by the time I was done, but you can definitely see where it started from. Gryphons need forepaws. ears, and eagle wings to be recognizable, so the pattern pieces aren't as straightforward as the dragon, but it is still easy to assemble. A scanned copy of my handdrawn pattern in pdf is here


 Just to give you an idea of what the pieces look like
Cut out the pattern pieces and trace them onto your felt.
Cut out your pattern pieces
First you will want to do the decorative work. I like to blanket stitch things, so have done all the stitching on this in that, with button thread. You could use embroidery floss if you prefer, but I have tons of black button thread to hand, so that's what I'm using (my gryphon is orange and grey rather than gold and black for the same reason-- those are the materials I had on hand.)

Just stitch the interior details of the tail. You will stitch the outer curve when putting the two body pieces together.

I have trimmed my grey wings to be slightly smaller. You don't need to, but I found that it made the wings cup and curve when I stitched them and I liked the effect.

Once the decorative stuff is done, put your two body pieces together. I start stitching at the top of the tail because I find it easiest to stuff the finished gryphon from the back
when you reach the bottom, you will insert the tummy piece by catching the point between the two body pieces.
start stitching the tummy piece to one body piece, go around the bottom leg, up around the foreleg and to where the point of the tummy meets the bottom of the beak.

 
Continue stitching the tummy onto the second body piece. Continue to base of the tail and finish off.

Go back up to beak and stitch the body pieces together until you reach the top of the beak.
 Insert the top of the head by catching it with a stitch at the top of the beak. 
Stitch top of head to one body piece and continue stitching around the ear until you reach the back of the head. Continue onto other body piece and end at front point of head piece. Finish off.

Leaving the back of the head and the upper back open, stuff gryphons ears and wings. You can add a little or a lot, it it will make the personality of your monster. Stuff the feet and forepaws firmly.

Stitch the back of the head closed and continue stuffing your gryphon. I like to use scrap fabric, felt, and other oorts I have hanging around, but wool, cotton, or fiberfill all work. 
Stitch the rest of the back closed and lay you wings along the spine.
Backstitch your wings onto the back of the gryphon.

Ta-da! You're done.

Monday, July 10, 2017

Cloth of Honor Project

I
As anyone who has ever mentioned "patchwork" in my presence knows, I love little bits of fabric and oodles of color all in one place. When my oldest daughter was tiny and my husband was in school I paid some of our bills by making festival and children's patchy clothing. When I joined the SCA, everyone told me that patchwork was more of an American westward expnsion sort of thing and that I would need to put it and my other favorite craft, crochet, away and focus on more historically accurate pursuits.

I found a few bits of clothing that were probably pieced, including the Lorenzo Lotto Lucretia dress and started making those sorts of things so I could integrate my various interests. I considered a German persona because of the amazing pieces of what seem to be patchwork in some of their outfits.

Then, I found the Imprunetta Cushion.and Lisa Evans' article in Medieval Clothing and Textiles 8  Anomaly or Sole Survivor? The Impruneta Cushion and Early Italian "Patchwork."  Having an extant piece rather than just paintings of textiles that could be brocades or appliqued rather than pieced makes things so much easier to discuss.


So, I determined to make a copy of the cushion and started trying to find lots and lots of silk scraps for the front and lots and lots of wool scraps to do the back of an itty bitty tiny pillow. I plotted that for years and started it on 3 seperate occasions. As you can see from the only picture I have of the most recent version, it didn't go as well as would be hoped. This one was foiled by a kid eating on it, but that also pointed out a problem. I originally thought that I just wasn't being exact enough, despite how honestly persnickity I was being. There is a problem with the templates in the article. I was assuming the 8 long diamonds that form the center were symetrical both up and down and left to right. That's how they are analysed in Lisa Evans' article but the stars become domed if done with that shape. In order to have them flatten, the outer part of the diamond needs to be larger than the inner point. I also need to refine the outer curve of the long diamond that finishes the out of the shape. And I don't want to even talk about the shape of the 9 patch blocks that go between the stars. Basically, my math isn't up to drafting these.

I just am not skilled enough to do the tiny exacft work of the cushion without yelling and throwing things. So, I decided to do an intermediate project that is proof of concept and gets me started doing medieval style patchwork. Lisa Evans mentions several paintings with what are referred to as a Cloth of Honor. The major example she gives is of the Virgin with one behind her but there are other examples, including a country bride in a sceen by Brugel. Not all are patchwork, and those that appear to be could very well be brocade or something else,, but there is an extant Hungarian example that makes patchwork ones a possibility.

I'll go into the Hungarian piece and the paintings more in the next post as I organize my documentation more, but mostly I want to talk about the progress on my own Cloth.
I started with a book of silk samples and have been peeling off the paper backings to cut my pieces. The material constraints meant I could only go so large with my pieces and that I needed a block that is graphic enough to work with darks and lights rather than needing exactly matching colors.. I wanted something with few pieces and not extensive math to calculate. Add to that a desire to evoke the stars of the Imprunetta cushion. Conveniently, I had a template for a spinning star that is a single piece but creates movement due to the curved pieceing. I have never used it before despite owning it for years.. Why? Because it cannot be machine pieced, the curves have to be done by hand. Since this is going to be an A&S entry, handpiecing was already a necessity and so its a good fit.

I pulled my silk out and began cutting the curved pieces. In the process, I ended up with more silk than I thought and was also able to cut out 2 inch squares. I decided to make these 4 patches, again to evoke the star and 9 patch of the extant cushion. The look gets closer to the paintings rather than the modern look of interlocking tesselating stars I started with, but it also requires more pieces to be a background. The fact that I was using thrifted and recycled silk so far made it so this particular project fit into a challenge I wanted to do (Ragged to Regal Challenge) and made me go looking for further reusable silk for the interstitial pieces. I found a white silk curtain and bought it for $1. The cloth is now closer to being something that can be draped behind a chair than the small square I started out which again makes it closer to the exemplars. It also makes it a lot more work. . .

I'm about 100 hours into it so far and still having fun. Even if it is no longer the "easy, proof of concept" project I started with. Its not going to be any easier than if I had done the cushion. But I'm this far in, still enjoying it, and excited about the results. I've got about 2/3 of the stars pieced, about to start cutting the white, and have all the 4 patch squares ready to go.

Monday, May 15, 2017

Growth and new research replacing old

My SCA kingdom, Artemisia, is gearing up for its 20th Anniversary this June. My favorite event locally, Arrows Flight's Toys for Tots,is also celebrating its 20th Birthday this year in November. The wave of nostalgia has me looking at my own SCA history. I originally began playing the summer I graduated high school in 1991. I happened to start in exactly the place I now live, and Arrows Flight was a Canton. I had spent the previous summer costuming shows for the Park City Shakespeare Festival and I thought myself very knowledgeable about the 16th Century.That summer I played recorder with a group of musicians, fought rapier with foils, and made a dress out of old table cloths. It was exactly what I was looking for and I wished it would never end. Seventeen is a very silly age, but oh so very magical.

When I left for college, I hoped to continue doing SCA stuff, but the local group had been going through a lot of political things and there wasn't a group to join. As I was broke, didn't have a car, and very, very young, I didn't realize I could have kept playing even without a local group. I reached out a couple of times to see about getting a group going, played with the incipient Shire of Ard Ruadh when I could get down to St. George (and they existed,) costumed for the Utah Shakespeare Festival, got a B.S. in history, played recorder and sang with friends who were alumnus of Renaissance Ensemble, played with the local Empire of Chivalry and Steel group when it cropped up, hung out at the Ren Faire, began researching Elizabethan Sumptuary Law and built the perfect garage for a Scadian with all kinds of hobbies and skills and the accompanying equipment.

Then my husband got a job up on the Wasatch Front and we were able to move north where there were active groups playing in the SCA. I jumped in with both feet almost a decade ago and haven't looked back. Seems like it is about time to do that, I guess. Evaluating progress is a useful tool for making future plans. This seems like a great time to create some focus for myself.

With that idea in mind, I pulled out my oldest major project; the gold coif I embroidered. It is based on an extant piece in a private collection. It also happens to be the cover image for Mary Gostelow's book Blackwork. Originally published in 1976, the book is usually pushed as the beginning book for historical blackwork. This was even more true 10 years ago when I was doing my research and there weren't as many other options.

I was displeased with the research flaws and problems with this coif, even before I finished it, However,  it is still something I am proud of. It is a beautiful, wearable piece of art as it is as well as being a case study in where mistakes can be made. All in all, it seems to be the perfect project for me to re-do as a growth project. I consider research to be my major art and I have certainly improved in that respect. The resources for materials and information have vastly changed, and so has my actual embroidery ability. I'm excited to do a better version of it.

I am starting with Jacqui Carey's book, Elizabethan Stitches, where this coif is case study 19, and laying out the embroidery pattern today. Better scale, more appropriate materials, and the correct stitches are the first changes. in the works.

Tuesday, February 28, 2017

The Impossible Feast: An idea

My SCA persona's motto is AT SPES INFRACTA (Yet, hope is unbroken) and I have a thing for flying pigs and the idea of making the impossible possible. I was looking through Facebook memories this morning and in 2014 I had seen an advertisement for Pig Wings, ribs that look like chicken wings. Rather than saying cool and moving one, my response was to go through a list of idioms of improbability and assign them dishes. This type of hyperbole taken to extreme lengths is called an adynata from the Greek ἀδύνατον  meaning both unable/ impossible and "to be powerful." It was a common Classical Period rhetorical device translated into Latin as impossibilia.  It fits well with my ancient Greek name of Praxilla which gives me further reasons to adore the idea. It would even make a fabulous conceit for a sixteenth century Venetian salon. Thus, I'm putting it here so I don't lose it.

An impossible feast to be served with blue moon cocktails and presented on the Greek kalends (Kalends are Roman. . .).

When pigs fly: pork ribs shaped like wings, or bacon wrapped poultry

When it snows red snowflakes: Strawberries in snow would be a very historical option

When grapes/pears grow on the willow tree: Willow catkins can be mashed and eaten. Willow honey is a thing. Perhaps baked pears drizzled in willow honey? Grapes could also be iced and served in a willow basket. Or wine is always a possibility

When fish climb the poplar tree: Salmon smoked on poplar. Poplar is also a popular paper wood, so paperwrapped fish of some kind might be tasty.

When the moon turns to green cheese: Mmm, cheese wheel

If the sky falls we shall catch larks: Plenty of Roman lark recipes. Adapt to use chicken or game hen

When the calves are dancing on the ice: Perhaps some variant of steak tartare?

When cows fly: Should be as straightforward as the winged pigs

When salt glows: There are lots of lovely pink Himilayan salt lamps and plates. Something served on those.

Cold Hell: No idea what to make, but its a fabulous name for a dish


More idioms to play with:

When the cow goes on pilgrimage on its horns
when the flagpole blossoms
When the reed plant blossoms
When the apricot blooms
When poplars grow pears and willows wallflowers
When the crawfish whistles on the mountain and fish sing
A week with three Thursdays
When horses grow horns
When a horned cat walks by
When a beard grows in the palm of my hand
When frogs grow hair
When the owl's tail blooms
When the crow will fly upside down
Sooner the cactus grow on my palm

And just because it is so very, very specific to my persona and personal likes, this Bulgarian phrase has to be included:  koga se pokači svinja s z´´lti čehli na krusa (when the pig in yellow slippers climbs the pear tree


Monday, February 27, 2017

Wool on Wool Applique: part 1.


I took a class on the subject of wool on wool applique at Estrella War taught by Bernadette de Costa Tempestad and when I posted the resulting make and take, I got mobbed with requests to share the handout. There was not a handout as such, so this is a compilation of notes. The instructor had some great references, and I have a few more I have from my own applique classes. Additionally, I took a class on intarsia applique taught Unna Hjalmirsdottir (I was the only attendee, so we mostly geeked out together.) Intarsia is also a wool technique that I find to be very similar to nomadic rug applique techniques and was mentioned by Bernadette in her class as well. I'm heavily interested in applique of all kinds as well as working with wool, so I'll be combining the various information. That said, it is obviously how I have interpreted the information, mixed and matched with what was swimming about in my head, so I'm sure I have missed a lot from the original class and added weird detours of my own.

Dalhem textile
Via


Lets start with the intarsia applique, as I have links to tutorials. The best known of the extant pieces are the inlaid woolen coverlets/ intarsia wallhangings/altar coverings from Dalhem, and Skepptuna which are held by the Historiska Museet in Sweden Inventory #23022 dated 1350-1499.


 A recent reconstruction of the Masku was done by a team of 16 headed by Elina Sojonen (blogging at http://www.neulakko.net/ )and Mervi Pasanen (blogging at http://hibernaatio.blogspot.se/ )  The original and the recreation were then exhibited together in Finland at the National Museum in Helsinki. There is quite a bit of analysis of this and a how to on doing this style of applique at https://historicaltextiles.org/category/embroidery/  It is a different style as it doesn't involve pieces being put on top of one another, but rather them being cut and fitted together like a puzzle and then whip stitched in place. Then strips of gilded leather are couched over the seams. The imagery is ridiculously fun and of the type we often see on SCA "Norse Coats." The actual time period it comes from is far outside the Viking age, but I can't help adoring it. Especially as there is a gryphon that I must, must do at some point. And a peacock. It screams to be Artemisian.

Skokloster Cushion
There are actually other pieces done in the same technique but with a different image style. This piece with poppies, called the Skokloster Cushion (inventory #24690 ) is medieval, but looks ridiculously modern .It is also held in the Historiska Museet, which is where most of the textiles of this type are.

The how to at Historical Textiles.org is pretty complete, as the technique isn't difficult so I'm not going to post a tutorial of my own unless someone needs further help.. You cut the pieces, which then create mirror images, as you can see from my in process pieces below and the poppies, So a grey background gets a red leaf and a red background gets a grey leaf. You tack it in a few places (or the teacher in my class used scotch tape) then whipstitch it into place. There is no backing fabric, so you end up with a single layer of wool. Then the leather strips are couched into place over the seams. You can see a small strip of gilded goatskin leather being couched down in my in process photo.

I'll get to working on assembling links for the next type of wool applique: wool on wool roundels like the ones we did in Bernadette's class and hopefully post that tomorrow.

Wednesday, June 1, 2016

Madder and garters

 I decided to try my hand at natural dyeing some yarn. I used Dharma Trading' s ground madder with an alum mordant and this tutorial from their site.  I didn't buy nearly enough dyestuff and wasn't able to get enough of my wool dyed consistently the same color to do stockings with it as I intended. I do like the color since I adore oranges and this has a definite rusty orange to it.  And it is certainly right smack in the middle of the color madder is supposed to give. I ended up with a lot of slightly different, yet very pretty shades, so small projects are now the order of the day.

Conveniently, I had the perfect small project in mind: garters. I have done several types of garters over the years: macrame, blackworked bands, tablet woven, and strips of silk, I have also tried buckled ones of leather and random bits of ribbons and tapes grabbed at the last minute. They tend to slip down if I have them comfortable enough to wear without worrying about blood clots forming in my legs, untie, or just be too tight, so I have yet to find the perfect garter for me. I read rave reviews from people who had tried out knitted ones. There was much exclaiming of "They don't call it garter stitch for nothing!" So I decided to give it a shot. Thanks to the research of Daniel Rosen (Old England Grown New) and Christine Carnie of  The Sempster, I found two extant pieces to base my garters on. The Sempster's link will take you to her Facebook album on 16th century garters with the pair she knitted for Daniel as well as pictures of a fragment in the Museum of London (object number NN18752, dated 1500-1599. It is not part of their digital collection) and a garter found in Haddon Hall in an account book dated 1632. The Haddon Hall garter is about 1 1/2 inch wide and the Museum of London fragment has a large variety but is close to 6/8 of an inch, according to Ms. Carnie. She examined the Museum of London's piece up close but only was able to see the Haddon Hall through the glass case.

If you have a look at those pieces you'll notice they are pretty utilitarian and nothing like the patterned set of knitted silk garters done in the round with gorgeous tassels found at the MFA.  Those are still on my list but nothing that complex is going to fit into the project schedule this go around. Nor are my knitting skills quite there. There doesn't seem to be an end treatment on the Haddon Hall garter so I decided not to justify my normal tendency to over do things and to just go for plain bands. Back and forth and back and forth and back and forth and back and forth.  Sportweight  yarn, 6 stitches per row.

This is one of the most tedious things I've ever done. I took them as my project over Memorial Day weekend camping with the kids. So there was plenty of time in the car and while sitting around to work on them. I'm not sure I would have got them done nearly as quickly if I had other distractions and the ability to switch to something more exciting.  But they do have a lot of grip and a lot of stretch so I am hopeful they will be a good idea.