Known World Heraldry and Scribal Symposium is tomorrow, so I won't get really going again on the Eleonora project for another day, but I'm excited to get moving forward with it again.
Showing posts with label leather jerkin. Show all posts
Friday, April 29, 2016
Finished Elizabethan suit
I need to get pictures rotated and there will hopefully be modeled pictures eventually, but I just wanted to make sure pictures of a complete object exist, since I'm terrible at remembering to do that. I also needed to make sure there was a blog today.
I did do one Eleonora dress activity. Mathew Gnagy (The Modern Maker) published his 16th Century Woolen Stocking Knitting Pattern today. I have wanted to do the Eleonora stockings ever since IRCC I but I am not an expert knitter and the prospect of doing the 20+ stitches per inch has freaked me out. I've been practicing. I even got as far as swatching on 0000 needles. Swatching and panicking. I'm so unbearably slow at it. I knew I could do a plain pair of stockings with a modern heel in a lower gauge but have been hesitating. I bought the pattern and he included a much simplified version of the Eleonora stocking with a patterned band that looks similar to the top of the band on the burial socks, but not the wide cuff with eyelets. It does have the decorative stitches down the back. It also includes shaping for the bottom of the foot and heel more in line with extant stockings. It has enough of the feel of the stockings to make me happy, but I think they are much more achievable with my current knitting skills in the time allotted. I do need to get different yarn as my silk is much lighter than the sock yarn this is patterned for.

Known World Heraldry and Scribal Symposium is tomorrow, so I won't get really going again on the Eleonora project for another day, but I'm excited to get moving forward with it again.
Tuesday, April 26, 2016
Buttons on and the leather jerkin is complete
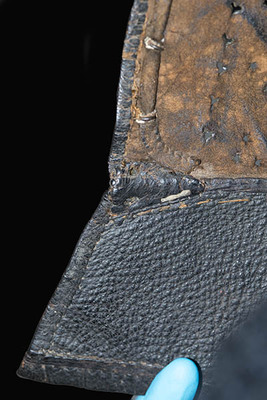
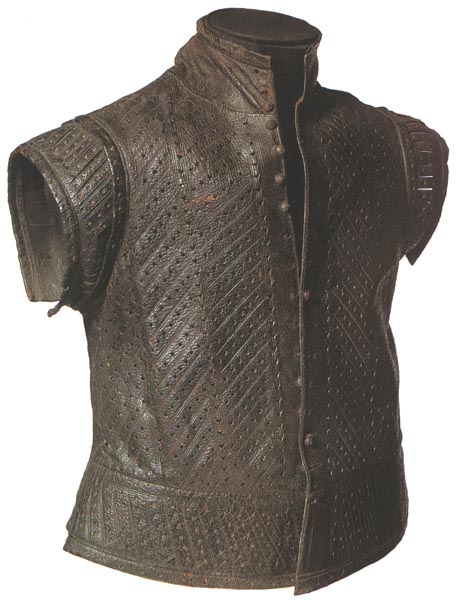
| Museum of London Object #118831 |
I had considered doing a bit more paint on the skirting, but I think it looks just fine plain and I admit to being a little worried that if I add more, I'll mess it up. Sanding the paint lightly didn't do much to remove it and I don't want to get aggressive. The overwrought back panel isn't visible at all when worn, so the jerkin will just have to do as is.
I am rather pleased with the buttons and just how easy they were to do. The inspiration jerkin in the Museum of London has a leather thong running the length of the front opening. There are punched holes through which the shanks of the buttons are pushed and the thong is threaded through, holding them taut. It was much quicker to do this than stitching them in place. And the shank of my buttons just so happened to be the exact size as the punch I had been using all along. Although it is doubtful the jerkin will be worn buttoned closed, I still think the tiny line of buttons is lovely and it certainly finishes things off. Now I just need to finish the doublet and pants.
Monday, April 25, 2016
Ironing with a mallet
I worked pretty solid on it all day to finish the rest of the punching. Since this is has a deadline. I did most of the sewing on the machine using felled seams. I just stitched the two pieces together, trimmed one side as close to the stitching and stitched the long side down. As it is leather, no folding under, just stitch and trim close to that second seam. As the blog title suggests, I did pound the seam down a little with a mallet. Although that wasn't all that necessary.
If you compare this to the picture of the pieces from last night, you'll notice that the doublet skirting is quite a bit shorter. I decided it needed a trim once on. So I need to repaint the bottom and possibly put more punches in. I say possibly because my shoulders are saying nope to that idea and my hands are blistered from the punch. Even the spring loaded punch makes causes exhaustion when there are hundreds of punchings.
I still need to do some trim on the under doublet, so Ill let this sit for a day or two while I work on the other and give it some thought. I also probably need to sand the inside back to see if I can get rid of the paint. I was going to line this, but once I got it assembled it jut really was better without. And this way the holes create ventilation. The only reason left to line it is to hide the paint on the inside. Which can't be seen at all when it is worn. Even if left unbuttoned it doesn't show, but I'm still embarrassed by it. I really hope sanding helps.
Sunday, April 24, 2016
I have to laugh
The Museum of London just wrote a blog article on the leather jerkin I'm using as inspiration for the one I posted about yesterday. And there are loads more images available now as well. I only mildly feel like the Universe is telling me what a crummy job I'm doing.
Actually, I'm feeling a bit less worried about how the jerkin is working out. My husband put the doublet on and I put the jerkin pieces on over that. If I cut down significantly on the trim I had planned for the doublet and keep it closer to a plain black wool, the crazy decoration on the jerkin looks nice rather than like it went to the carnival.
I also took the back piece, flipped it to the suede side and re did the branding and painting. No black makes a considerable difference, as does leaving the gold off the collar. I'm much happier with it now. There is one spot on the shoulder where the suede is a bit more textured than I'd prefer, but I think once worn it will even out.
Still lots of punching to do. My shoulders are complaining so I'll get back to it tomorrow.
Thursday, April 21, 2016
When good clothing goes bad.

And this is when the project turned. I pulled out the punches and realized that they were not even moderately sharp. Fifteen or so hits with a mallet and it kinda sorta went through. So, okay, sharpen them. I pulled out jewelers rouge and a hone and I thought I had it in hand. That didn't go as well as would be hoped. They were better, but still not working well enough to be a possibility for the hundreds of holes that needed to be made.
I do, however, have a Craftool Hand Press from Tandy Leather that I got awhile back to put round holes in my lamellar armor after yelling at how hard it was to do that many holes in that many plates. And I paid a lot of money for the convenience. So I figured that was a good solution. No stars or hears or diamonds, but there would be holes.
So I punched bunches of holes in the jerkin. At which point I determined that the soldering iron lines just weren't showing up well. Its a result of using grey leather, but it is the right color heraldically and I got a killer deal ($15 a hide, which meant I only had to spend $45 on leather for this, this making it a possibility at all.) So I figured gilding leather is a reasonable thing. Paint brush came out. There are some grooves there due to the soldering iron and the paint was catching them reasonably well. Not great and I wasn't totally sold, but it wasn't going to come off so I kept going. And then I painted the diamonds up top. And I hated them. So then I pulled out the black to fix it a bit. Yeah. That's where FAIL! happened. But I kept going, because there didn't seem to be an option. Sigh.
Maybe I can sand it off. . .
Subscribe to:
Posts (Atom)