Showing posts with label hats. Show all posts

Wednesday, April 27, 2016

I may just keep the hat


It is just a cheap felt hat I picked up at Halloween planning to cover it with fabric to make a tall hat, but the grey was a good match for the jerkin so I left it as is. I am a sucker for accessories and needed a break from the doublet trim. I stitched on a couple of cream ostrich plumes, a black one, a white feather pad and a couple of green/black rooster feathers. The side back of the hat is probably its best angle (which this isn't.)  The herald in question already has a hat he likes, so I'm not sure if he'll go for this one or not. If not, I'm keeping it. I have a silver velveteen I plan to make a doublet gown from and I have a set of purple suede hides I'm going to make my own leather jerkin from. I can make another hat for me if he likes this one, but if not, I can certainly integrate it into my wardrobe.

The doublet should be complete tomorrow-- just the trim on one sleeve left and the buttons to stitch on.

Wednesday, April 25, 2012

A challenge within the challenge

My friend Lady Maysun Nura al-Ishfahani al-Samarkandiyya decided yesterday to issue a challenge to the artisans in Artemisia to make a hat in the month of May. Beginning April 24th and continuing until the last day of May, the populous is challenged to make a hat, veil, headcovering, headfrosting, intricate hairstyle or some other kind of 'do. No prizes or judging, justfor fun and to stretch ourselves.

Conveniently, I was already planning  a bonnet to go with my cappotto. Everything was sitting in a pile to start it, just hadn't gotten going yet. So, I got going yesterday afternoon.

The extant Don Garzia cloak has a matching bonnet so deciding what style hat to make to match was pretty much a no brainer. I did briefly consider whether or not it would go with my outfit, but even if it doesn't go with the current dress, bonnets are very popular in 1540 Italian portraits on women. One of my favorites is this woman in bronze with lattice  partlet and feathered bonnet. Venitian School 1540. With the orange and blue, the cappotto and bonnet will coordinate with other parts of my wardrobe.

Super simple basic construction on this one. I followed the Sempstress tutorial for a cartridge pleated upper class hat but did it entirely by hand rather than using my machine. I did put a layer of wool felt into the crown. There are two layers of wool felt in the brim.

I may be the only woman in North America without a curling iron, so the feathers still need a bit of shaping and once I settle on my fan decoration I want to make a matching brooch for the hat, but other than that it is complete.

So, one more complete item, and I'm ahead of the game for Maysun's challenge. I've got a veil on my to-do list as well as a jeweled hair ornament so I might end up doing a few more headcoverings in May, just for good measure.

Sunday, September 25, 2011

I was touched by his noodly appendage.


Or something. Pastafarianism is my only explanation for the current look of my hat. When someone (or two) mention that the wooly ringlets you are making to decorate your head with look rather like ramen noodles, it might be wise to NOT take it into your head to swap the silver/white bows in the portrait for copper ones. Even if they are from free ribbon left over from the Great Christmas Ribbon Salvage Operation. Copper is one of my favorite colors and I thought, "Hey, that will go nicely with the orange in the dress." I did not, however, consider the way in which copper colored bows nestled into wooly ringlets would take on the appearance of spaghetti and meatballs. I am wearing the Italian Renaissance equivalent of a Flying Spaghetti Monster hat.  All my husband has to say is "AWESOME!"

I'm trying to decide if I should redo it completely or be happy with the silliness.  It is a goofy hat to begin with after all.

More bows to add and I still need more curls.  I baked oodles, but it doesn't come close to covering the garland from all the angles it needs to.  I went back and re-read "The Wonderful Bulbous Balzo," for the umpteenth time just before starting construction and changed my mind totally again on how to do this.  I agree that this is probably a ghirlanda or garland and so I shifted at the last minute from a grapevine shaped base to a stuffed roll.  I was trying to get the proportions right since I'm such a large person with a melon for a head, but I may have over estimated.  The roll is pretty significant and doesn't have quite the delicacy of the one in the painting.  Shows me for last minute winging it.  I had made actual measurements and calculations when i was going to do the base out of vine.  What I actually did was sew a base of wool fabric and stuff it with wool.  The curls are stitched into place, but then I also took my felting needles to the hat in a totally out of period technique and tacked them further into place.  I didn't manage the linear look of the curls in the portrait, mine are much more tousled.  It's probably due to size of the ringlets and the base.  I certainly need a lot more of the curls than I'd anticipated.

Right now its in the "I hate this, this is terrible" stage.  Hoping more noodles and properly placed meatballs will make me either love the silly thing or abandon it completely.

Thursday, September 8, 2011

Lots of string, not much progress

I've been wrapping chopsticks in wool yarn and baking it in a low oven and making curls.  I've also been boning the inner layer of the bodice.  Like I said, lots of string and not much progress.  I figure I have about a third of the curls I need, depending on what I end up using for the foundation of the hat.  It would be going faster if I had more chopsticks.  I'm doing them 10 at a time.  Had to stop for today and wait for evening since even a low oven is making the house unbearable.


I've got most of one side of the front of the bodice boned.  I didn't have the thick hemp so I'm doing multiple strands of a heavy cotton cord.  Not so sure its going to substitute since I have such a squishy shape, but I guess I can always make a corset for underneath instead if it really goes poorly.  At least that's what I keep telling myself.  I really don't want to go buy cable ties.  Not for any particular reason, I just want to make this dress a "free" one from entirely stash materials.  My September personal challenge is to not buy any crafting materials.  It really shouldn't be hard since I have a large stash of stuff, but there always seems to be something I just don't have.

Wednesday, September 7, 2011

"Her eyes, brown as fir cones in autumn, scattered laughter."

I think I have a new hero. Isabella d'Este, the Marchesa of Mantua. How can you resist a woman called "First Lady of the World?" Sure, her husband had Lucrezia Borgia for a mistress, but Isabella was known far and wide for being a more competent ruler. She was the fashion idol of Anne of Brittany, twice Queen of France. On top of it all, she invented a hat.

She created and promoted the zazara (at least according to Paola Tinagli in Women in Italian Renaissance Art: Gender, Representation, Identity.)  I'm still in preliminary research mode on these, but they seem to be the large balloony type of headpiece, often sort of shaped like pumpkins, even down to the ribs.  More totally round than a balzo, they don't have the shape that starts close to the head and projects back into the characteristic bulbous shape.  Here are a few more for good measure.   

My only issue now is, due to a lack of research and true definition, I can't decide if the frothy confection of curls and bows Lucretia is wearing on her head is a zazara, a balzo, or something else entirely.  That isn't going to stop me from making it.  I've got wool yarn coiled on skewers baking in the oven as I type this, getting ready to play with.  What it IS going to do is add another dress to my "must make" list.  I'm going to have to make something with a clearly defined zazara and possibly one form one of Isabella's portraits.  I love the Ruben's portrait, as well as the Titian I've got there at the left (painted when she was 60, she forced him to repaint her with a young face-- her own version of plastic surgery.)  I am SO getting sucked into this Italian.  Total slippery slope here folks.

Tuesday, September 6, 2011

Finished the povoinik

And yes, it is not a particularly attractive piece of clothing. That's alright though. It was never intended to be worn alone. Not even at home. There were to always be a couple of additional layers worn with it for casual wear and lots and lots more for doing things like leaving the house. The decoration at the forehead might peek out from under them, hence its focus, but mostly it was just supposed to be a tight little cap to keep the dangerous hair of a Russian woman contained.

I used a few more of the little flowers and I'm really pleased with the mirrors and beads and gold. I'm laying a solid foundation of bling to build upon. I think there are enough of the flowers with the bugle bead flourishes to embellish the rectangular flap that attaches to the back of this. Then I plan to use some of the plain flowers and perhaps some of the larger pieces to embellish the ubrus (sort of a heavy veil-- the word means towel.)

The new Italian/Lotto gown is going pretty well. I sewed most of the boning channels for the bodice late last night and plan to finish the rest up tonight after my kids are asleep and I can get downstairs to the sewing machines. I still haven't gotten around to making a corset yet, so this will have interior boning like the Camilla dress. If I didn't have my shape I could probably get away without it, since there are definite wrinkles at the waist of the painting, but I need shaping and support. I'm going to "bone" with hemp cording, however, in order to give it a softer shape. I plan to add a layer or so of wool felt to smooth the bones out and as a substitute for the fur lining that I'm forgoing. The bodice will have 6 layers like the last one since it seemed to work pretty well. I added a little extra allowance to allow for the cording. Right now the bodice is too large. Hopefully threading the cording in will solve that problem. Guess we'll see how that goes some time tonight.

Monday, August 29, 2011

Making a povoinik


I thought I'd share how I assembled my little coif/povoinik since I haven't been really able to find much information.  Lisa Kies/ Mistress Sofya la Rus (as always) is the go to source for Russian re-enactors in English.  Her website is FABULOUS.  She has 3 "patterns" for povoinik, but I thought it might be helpful to go step by step.  This is the 3rd pattern.  I'm using it because it seems a bit more accurate to me.  Not that that is necessarily true, because we have no extant pieces to compare it to, but it is much more like the povoinik that is worn with traditional costume.  It also has a lot in common with Elizabethan coifs.  In addition to Sofya's site, I'm using the instructions from a site on traditional dress.  It's in Russian and I'm working with directions via Google translate, so its a bit interesting, but I did like the cuts used.  I also like the lining and additional decorative back piece, even if I didn't do mine that way.

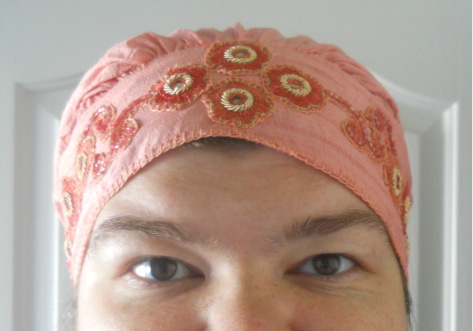
So, here we go.  I'm doing my povoinik in a soft peach silk.  In part that is so that it will match the appliques (since this is the dupatta for the outfit I scavenged them from) but mostly its because I have a shortage of white linen in the right weight right now.  Linens and brocades would all be nice for this project.  I probably actually want more body to the fabric than I will end up with, but I do plan to add a removable lining later so that I can wash the lining without having to wash the whole hat and that should take care of some of the issue.

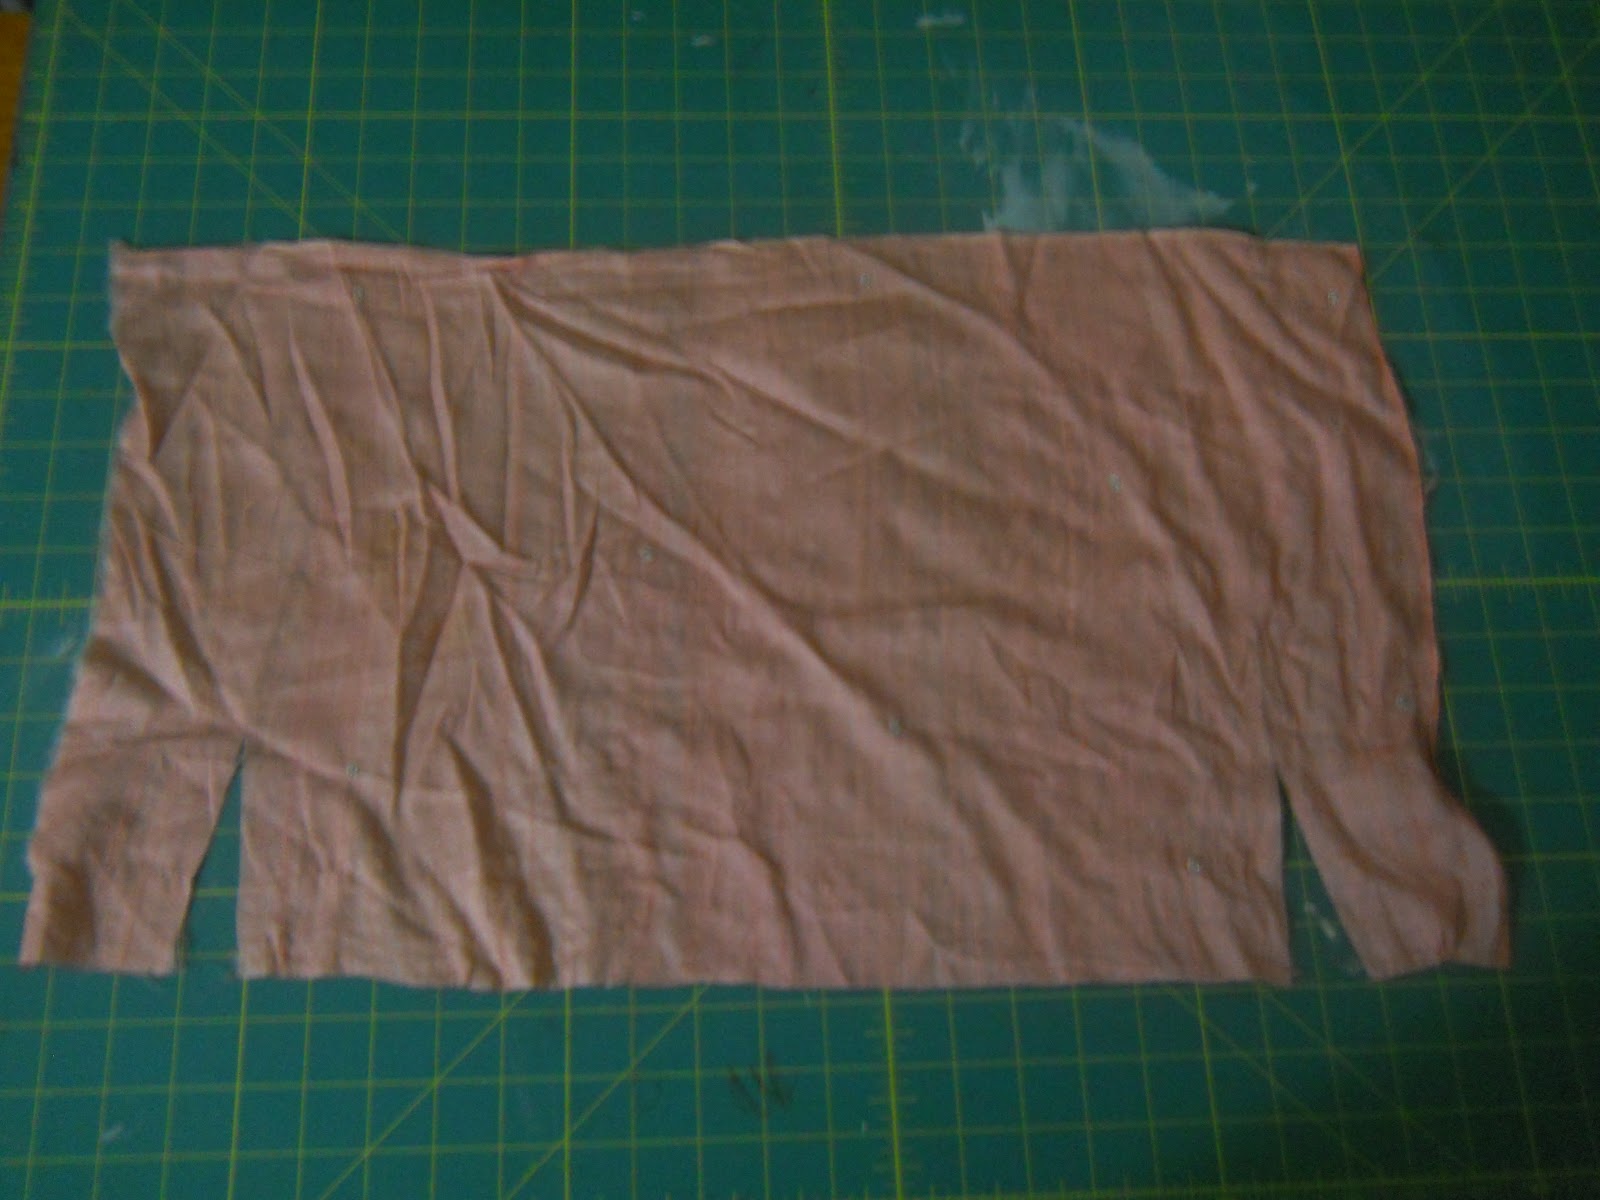
Step 1: Cut a rectangle.  The Russian instructions suggest about 10x13" and Sofya says to do the height the length from ear to ear over your head (plus seam allowances) and the width the length from your forehead to your nape.  I cut mine pretty large since I have a melon for a head. (mine's about 14x20)  Cut two slits on the front edge about 3 inches in about 4 inches deep.  As a side note, don't iron your fabric and then sit on it crumbling it up into a pile of wrinkles.

Step 2: Gather the center section.  You actually want to gather the whole thing, turning the corners and gathering all 3 sides.

 Step 3:  Sew the two short ends of your outside pieces together.  This seam is now the center of the front of the povoinik. 


Step 4: sew your gathered edge to the front band of the coif distributing the gathers evenly.   Now would also be a good time to do a rolled hem on the short sides of the rectangle.


Step 5:  Take the other long end of your rectangle, turn it under and sew a casing/hem.


Step 6:  thread a drawstring through your casing.

Now the fun part comes.  Decoration!  You'll notice in the Russian article that there is a wide piece of trim put over the forehead piece which covers the seam.  That makes it really convenient to make your povoinik and then add a slip of embroidery so that you're not trying to do the decoration on two separate pieces that are then seamed together.   I'm planning to embroider the forehead, and then attach a facing to finish the front edge and cover the gathering on the inside.  How you finish the front edge is going to depend on how you chose to decorate the forehead.  I made one where I wanted a narrow front band and just folded it in half and stitched it down inside making it into a facing.

I'll get going on the embroidery/applique and babble about more finishing options as I show you my progress. 

BTW, this isn't nearly as puffy on my head as on the mannequin.  As I said, I have a large noggin, and the poor dear has no hair to need the extra volume created by the gathers, where I do when I get my double braids wrapped around my head.

Saturday, August 27, 2011

Just lacks a ribbon and we have a volosnik

I thought I had a ways more to go with the netting, but ran out of the pearl cotton I was using (left over from another project)  and decided to check and see how much I needed to purchase.  I put in a temporary drawstring of the first piece of cording that came to hand thinking I had quite a ways to go.  I tried it on and its plenty roomy enough to cover my braids and the povoinik that would be worn underneath.  Hooray for being done with it much more quickly than I'd hoped.

Since this is a first attempt , won't really be seen much in the finished outfit, and I'm trying to use as much stash as I can for certain elements so I can splurge on others; I didn't use gold, silver, or silk threads, which would have been more appropriate.  I opted instead for a light cotton perle.  I did a series of Solomon's Knots rather than netting.  Both use a gauge to loop and knots to stabilize, but I'm much more comfortable with a crochet hook than a netting shuttle.  I used the out of period technique in the interest of time, so I'm not still making this next summer.  As I said, just a little bit of finish work left.  I'm planning to starch the mesh a little so that it gives a more proper shape.  I think I will just sew some more of the green into a tube and use it for the ribbon to continue with my salvaged materials theme here.

I've been watching Star Trek:TNG while I sew so I have decided to make the povoinik and pozatylnik next.  I better explain that last sentence, hadn't I.  A pozatylnik is a rectangle of fabric that lies over the back of the neck, covering it from exposure.  It always reminds me of the headwrap/drape the Ferengi wear.  The povoinik is the basic coif that starts the whole edifice that is a Russian woman's hat.  It's a pretty simple coif with a drawstring at the back to draw it tight over the double braids, but they usually has a decorated forehead just like the volosnik.  The pozatylnik is attached over the povoinik to cover the neck.  The volosnik is worn over it.  Its sort of analogous to a chemise and drawers and petticoat for the head.  As I said, we're building a proper foundation for what goes over the top.  Just need to decide if I'm going to use something different for the forehead of the povoinik or continue on with the applique.

Thursday, August 25, 2011

Starting work on the volosnik

I got a pretty good haul of embroidered appliques from the salvage operation and decided to start playing with them.  There are a lot of the same lotus fan and flower, but there were also a few pieces that didn't have many duplicates.  I decided to play with the orphans and do something small to start with. 

The first idea that came to mind was a volosnik.  It's a little cap with an embroidered forehead piece (called an ochel'e) and a net that covers the hair.  Russian married women were obliged by tradition, superstition, religion, and often law to cover their hair.  A Russian girl changing her braids from the long single braid of a maiden to the two wrapped around the head of a married woman and covering them was a big part of the marriage ceremony.  I really like the headcoverings of medieval and "Renaissance" era Russia with their elaborate layers, each with a particular function.  Its very like the underlayers of a dress with each giving the whole its correct shape.

The picture in the background is the cap of Czarina Maria Dolgorukaya.  She died 4 months after marrying Czar Mikhail Feodorovich and was buried with this hat in 1624.  The embroideries are gold trees of life and unicorns on a silk taffeta that was originally scarlet.  They symbolize marriage and virginity.  (Information and picture is from Treasures of the Czars a catalog of the exhibition presented at the Florida International Museum with the assistance of the State Museums of the Moscow Kremlin.  London, 1995)

  While it would be preferable to actually do the symbolic embroidery, I don't have the time and there are examples of Russian embroidery that is strictly decorative and quite a bit of floral embroidery.  I did want to keep the general look by utilizing the axial symmetry and horizontal layout.  Thus I used a large oval piece in the center and am playing with the appliques back an forth from a central point.  Once they are all in place I will go back over them with a cord along the edge as is the hallmark of period applique.  I had a scrap of green silk about the right length and not really large enough for other projects that went beautifully with the deep peach and golds so I pulled that from my cabbage bin.  While red was the most popular color in Russian clothing; green, blue, and other bright colors were also very popular.  Black was even starting to be used for people other than widows and clergy in the 16th century as long as it was heavily decorated.  I will put a layer of wool felt inside the band to stiffen it once the embroidery is complete.  Then I'll start the netting for the hair cover. 

Friday, June 3, 2011

Balzo beginnings


I really love hats. I love wearing them. My mom has very few pictures of me as a child without a hat of some kind on. I am often identified at events as "the Lady in the giant hat." I also really enjoy making them. If my SCA heraldry ever passes it will be a hatter's bow, a tool used for carding wool and more often fur used in the manufacture of hats. I'm also a felting fool and wool fanatic. Basically that's all the long way 'round to say I've been excited to start working on the balzo.

I taught a class back in March on the making of a basic felt hat shape. We used a resist form to layer wool roving on and make a basic "hood" or body. Its a felted and lightly fulled base that can be blocked and finished to make a variety of hat shapes. The ugly duckling I'm wearing on my head is the demo piece from the class. Its oversized and wonky and uneven. I think its going to be perfect for the balzo project-- eventually.

First up is a bit of fulling to make it smaller and to firm up the felt. Its going well so far. I'll be trimming it to a small crown shape soon.

I looked for some articles on the creation of balzos, but didn't find exactly what I was looking for. This one is fascinating, but the construction techniques are more suited for hat styles larger than the type Camilla is wearing. I want the red and green dress from a painting by Lorenzo Lotto, however, just so I can make and wear the hat. Fluffy, curly. and oversized, its a lot of fun. It isn't the sort of hat in my portrait, however. My hat is quite a bit tamer. It really seems more like a shaped crown with a padded roll. My choice to not do a cane or vine frame may be a bias from my preference for working in felt, so I'm certainly not sure. Again, I'm stumped and at a bit of a loss since this really isn't my area of research and I'm having to skim the surface. Looking around for views of sides and back of balzos turned up a couple of rather helpful paintings though. The most interesting to me is "The Giusti Family of Verona," by Antonio da Vendri. Its dated about 1520, so its early for me, but the hats seem about the right size. A full back view and some side views. There are a couple of others that have side views of very definite padded rolls on a hat crown. Oonagh's hats are of this type and she has some great portrait examples. Camilla's is really similar, with the tapering roll, but there seems to be a bit more smoothness, more of a transition between the crown and roll. It could just be the way its painted, however. For that matter, with as close as the color match is between Camilla's hair and the hat, it could actually be an elaborate form of hair taping with a netted caul or something. I'm going with a hat, though.

My plan is to attach a felt roll integral to the hat and then cover the entire hat so the shape is smoothed out a bit. I'm hoping that proper shaping and blocking will keep the hat in place. I've found with past hat projects that balancing the hat and proper fit makes things you wouldn't think would stay on do quite well.
This picture is after a really long day that included me nursing babies, picking kids up and taking my hat off and putting it back on. There are no pins or anything else holding this hat on. Its just well balanced. Huge and silly, but balanced. Despite the size and weight its actually really comfortable to wear. Hair prep is a big deal too. A couple of weeks later I tried to wear a hat I hadn't quite finished. It was really back heavy and the base wasn't well fit. I also was in a hurry and my hair not as tightly braided and secured as I usually wear it. It was a disaster and my hat sat on a table rather than my head for most of the day. I joked with my husband that I will never leave the house with a new hat not tested for aerodynamics.

So, that's the challenge. I need to figure out how to get a really good fit on the balzo. I'm pretty certain that's why there's so much visible hat flat to the head in the portrait. Its a counterbalance to the back heavy roll. If the fit is snug enough it should work in concert with the backstop provided by the ridge of hair formed by either hairtaping or wrapped braids to keep the hat securely in place. We'll see how it goes.